|
<< Click to Display Table of Contents >> Patient Statement |
  
|
|
<< Click to Display Table of Contents >> Patient Statement |
  
|
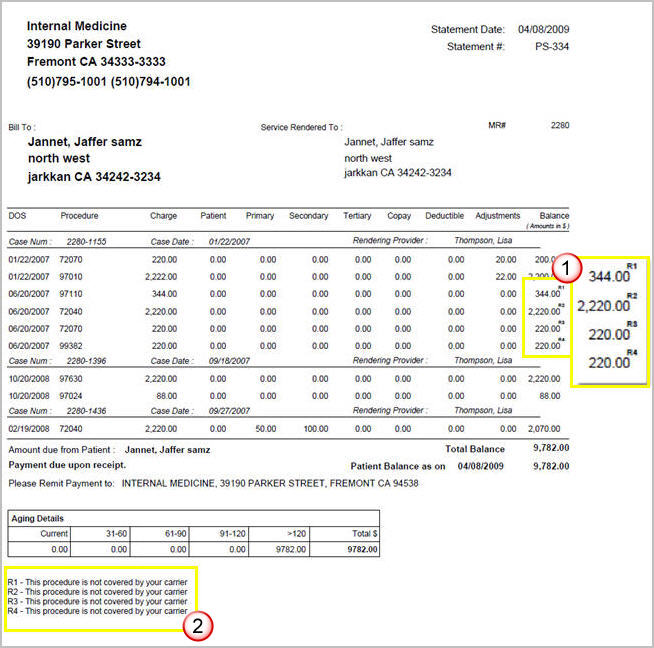
Patient Statement contains details of the amount due for payment from the patient. This statement is generated and sent to the patient to remit the due payment. It includes information such as DOS, procedures and the related charges, details of insurance payments received against the lines billed to the patient and also details of Copay, Deductible etc.
1. To generate the Patient Statement, click on the Reports module and choose Patient Statement to open the corresponding screen.
2. To generate the Patient Statement for a particular patient, type the first three letters of the name in the Last Name or the First Name box. From the list that appears, choose the required patient.

3. To generate the Patient Statement for a particular case, click on the search ![]() button and choose the required case from the list.
button and choose the required case from the list.
4. To generate the Patient Statement for patients with amount due between two amount values, enter the minimum value of the amount in Due Amount From box and the maximum value amount in the Due Amount To box.
5. To generate Patient Statements for all patients having last name between two given alphabets, click in the Patient Lname Between box and choose from the available alphabet ranges.
6. To include closed lines while generating Patient Statements, select the Include Closed Lines box.
7. Patient Statements can be generated for the following date ranges:-
(i) As on Date - Choose this option to display Patient Statement as on a particular date.
(ii) DOS Range - Choose this option to display Patient Statement between two given dates.
(iii) Aging Bucket - Choose this option to display Patient Statement within the given aging bucket range i.e. <30, 31-60, 61-90,91-120...etc.
(iv) Last Run Date - Choose this option to display the Patient Statement from the date since the last run date.
If the user wishes to exclude the Patient Aging from printing on the statement, the check box ‘Do not Print Aging’ should be checked during the statement generation. By default both options will be left unchecked on the Patient Statement screen.
8. If you wish to print any additional messages/information on the Patient Statement, type it in the Message box.
9. After entering all the necessary parameters, click the Generate button. The Patient Statement will be displayed in pdf format as shown below.

10. To print click the Print ![]() icon on the top or click the Save
icon on the top or click the Save ![]() icon to save a copy of the file onto your computer.
icon to save a copy of the file onto your computer.