|
<< Click to Display Table of Contents >> How do I record vitals during the visits? |
  
|
|
<< Click to Display Table of Contents >> How do I record vitals during the visits? |
|
The Charting screen.comprises to two main sections, on the left are pre built content headings
(SUBJECTIVE, OBJECTIVE, ASSESSMENT, PLAN etc). Under these headings, different Level-1 (component)s are listed. When a Level-1 (component) is clicked, a customizable list of Level-2 (Items) to be included in the chart note is presented on the right.
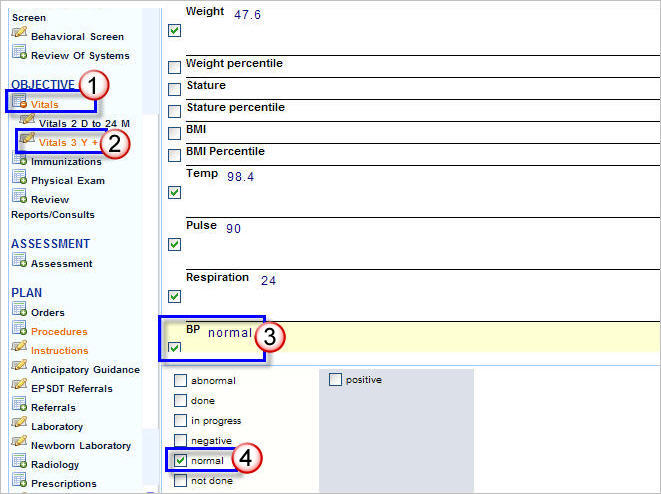
The Vitals Item list can be oriented any way you like. To add an item to the chart note simply click in the check box beside it. When a box is clicked, additional items appear on the bottom or on the right for inclusion in your chart note.
|
|
Click on Vitals listed under OBJECTIVE on the left side on the chart. |
|
Since this patient is over 3 years old, click on Vitals 3 Y +. A list of items will appear on the right, the list here includes commonly recorded vital items. |
|
Click in the check box beside BP, choosing this option will bring up additional Options below to describe the BP. (You also have the option to place the cursor next to BP, click and write your own description if required.) |
|
Click in the |
|
Similarly enter other details like Height, Weight, Temp, Pulse etc by selecting the required item in the same manner as described above.
5. To make this chart available to the physician for examination, click in the Save as options box and choose ![]() then click the Save As button.
then click the Save As button.
6. The Charting Saved Successfully message will be displayed, click the Close button. The chart will be saved and placed under the Ready for exam tab on the Clinical Desktop.
7. Click the close ![]() button to close the charting screen and go back to the Clinical Desktop page and move on to the next patient.
button to close the charting screen and go back to the Clinical Desktop page and move on to the next patient.