|
<< Click to Display Table of Contents >> How do I create a Follow up Appointment |
  
|
|
<< Click to Display Table of Contents >> How do I create a Follow up Appointment |
|
1. From the Scheduler, click on the last appointment that the patient made, this will open the Patient Information page as shown below.
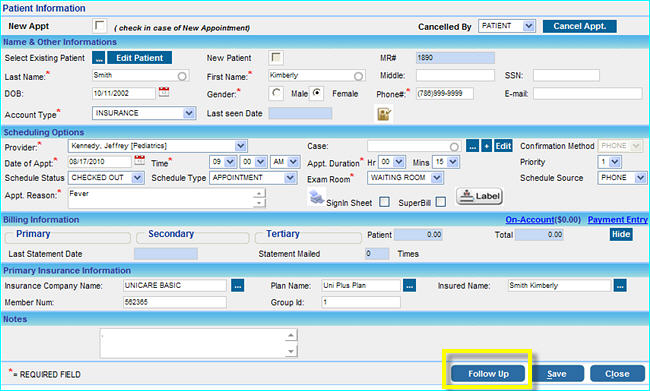
2. Click on the Follow UP button, this will open the Recurring Appointments window as shown below.
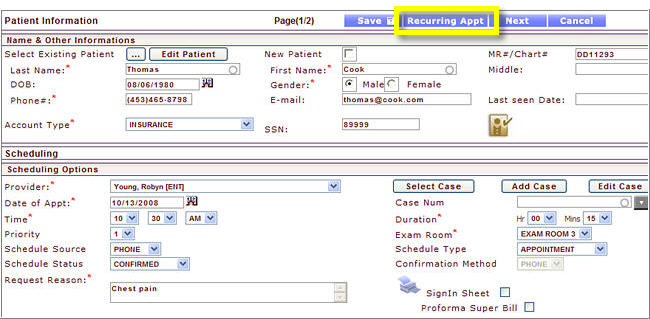
3. Choose a Date for the Follow up, the Status is set to CONFIRMED by default but it can be changed if needed.
4. Enter the Start Time and Duration and click the Create button.
The Follow up appointment will be automatically created and displayed in the area above with the details of the appointment like NO, Appt ID, Appointment Date, Time, Duration and Status. This appointment will also be visible in the scheduler.