|
<< Click to Display Table of Contents >> Collections Manager |
  
|
|
<< Click to Display Table of Contents >> Collections Manager |
|
1. To view the Collections Manager, click on Collections Manager module form the menu. The Collection Manager will appear as shown below.
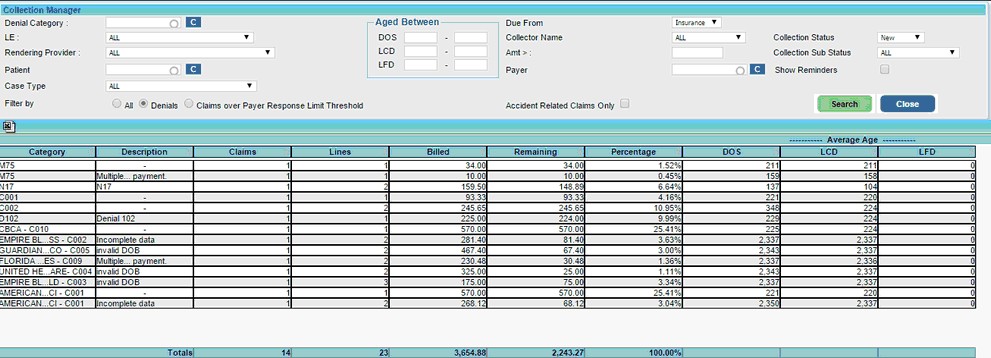
Collection Manager will open with default Filter by as 'Denials'. Click on search to Display all the Denials posted. If the user want to see claims which have not received any response within a given time period, Click on 'Claims over payer response limit threshold' button and search and those claims will get displayed. New filter 'All' is added in the Filter by Options to list both Denial Categories & Claims Over Payer Response Limit without having to toggle the filters to list both the claim categories. Claims will be listed according to a category, for e.g. claims without any response for a particular Insurance Company will be classified under No Response.
1. DOS, LCD and LFD Aging now have the option to filter with date ranges.
2. To view details of the Claims under any category click on the Category, the details of the claims under the category will be displayed in the area below.
![]()
3. To work on a denial, click on the MR# from the list to open the Denial Workshop screen as shown below.
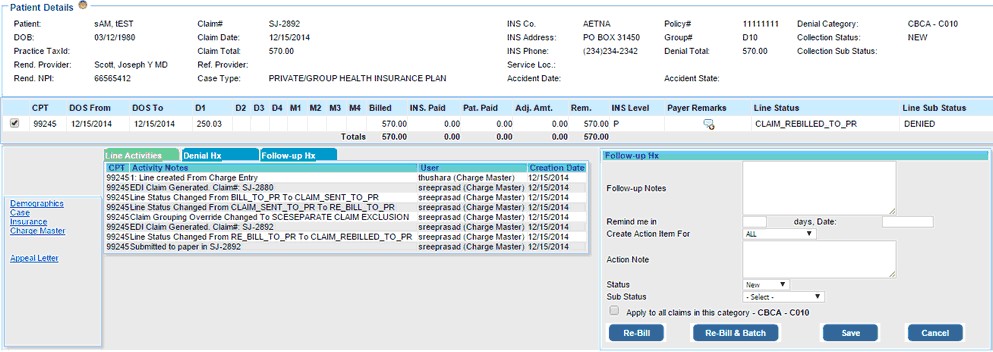
4. All the details required to work on this denial is provided on this page. On the top, the Patient Information area provides all the information related to Patient, Claim and Insurance.
5. The details of the lines are displayed below the Patient Details area.
6. On the left side, links are provided to open the pages related to Patient Demographics, Case, Insurance,Charge Master & Appeal letter can also be generated .
7. A History of the Line Activities, Denials and Comments is displayed in the middle. All activities performed on a line is displayed under the Line Activities tab.
8. Enter the follow up notes in the Notes area on the right.
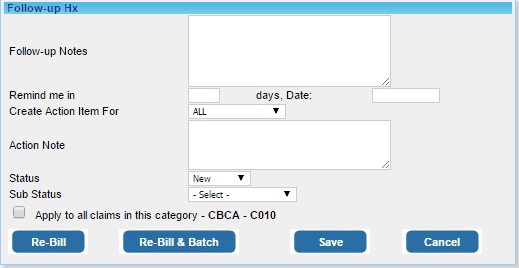
9. You can set reminders to work on this denial again at a later time using the Remind me in options.
10. Enter the current status of this denial in the Status box, for e.g. if the issue has been resolved, set the Status as Resolved and Sub Status as Re-bill. Otherwise if the issue is still pending, set the Status as Pending and choose the appropriate Sub Status.
11. Options are provided to Save or if required Re-Bill & Re-Bill & Batch directly from this screen.