|
<< Click to Display Table of Contents >> Charge Entry |
  
|
|
<< Click to Display Table of Contents >> Charge Entry |
|
Charge Entry through Practicesuite:
Now, we will show you how to enter Charges in Practice Suite.
| • | To go to charge entry Screen, Click on the “Charges” Module in the Navigation Menu. |
| • | Under charges, Click on Enter Charges & Charge Entry Screen will pop out. |
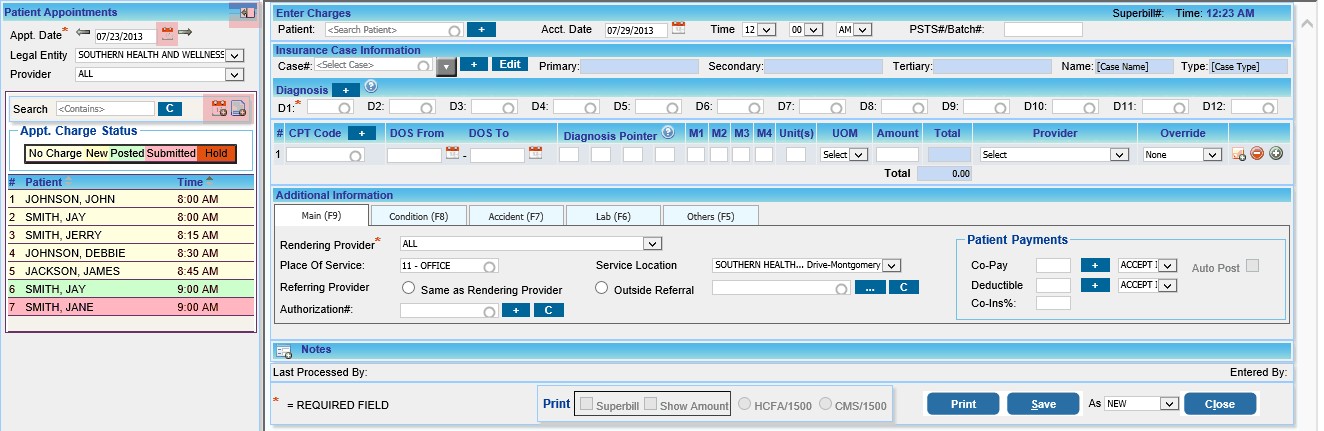
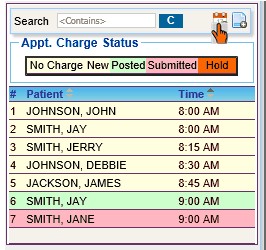
| • | Appointment view can be hidden by clicking the Hide Menu |
| • | Navigate Different Appointment dates by pressing the next and previous arrows provided |
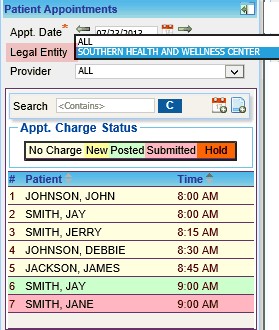
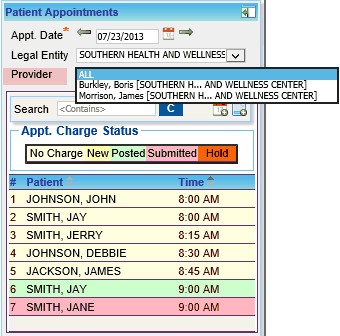
| • | Select any required Legal entity & Provider in which we need to enter the charges from the drop down and Screen will refresh with only the list of patient’s appointments for that particular Legal Entity or provider. To see all the appointments of all doctors & legal entity, Select All on both the Fields & Appointment area will be updated immediately with the list of patient’s appointments taken. |
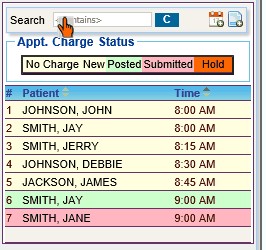
| • | To search any particular patient from the appointment list, type the name of that patient in the search field and only that patient's name will get displayed. If we need to create a charge and Appointment on scheduler and then please click on the appointment Icon |
| • | Once a patient is selected from the Appointment list, the insurance case information’s of that patient will instantly appear on the screen with Patient Alert(s) If any. |
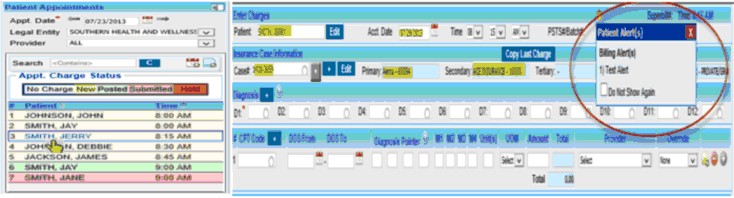
| • | By clicking in the case # box, a list of the present cases for the patient will be displayed if any. Click on the EDIT button if we need to edit the case selected in the case # field. If none of the cases are appropriate for the particular visit, add a new case by pressing the ‘+’ button right to the Dropdown & the Case setup window will open up. (Link towards Edit case) Enter the case details and make sure that all the information’s are correct and up to date.  |
| • | After selecting a case, enter the correct diagnosis in the Diagnosis fields. You can enter up to twelve diagnoses for a patient in the D1, D2, D3 ….. D12 boxes. If we need to enter a new diagnosis code which is not listed in the encounter master, we can add it by pressing the ‘ |
| • | In the Procedure area, enter the CPT codes for the diagnoses that you have entered. When you choose a CPT code, the corresponding details for each CPT code will be displayed below. If we need to enter a New CPT code which is not listed in our standard Fee schedule, we can enter it directly from this field by clicking on the ‘ |
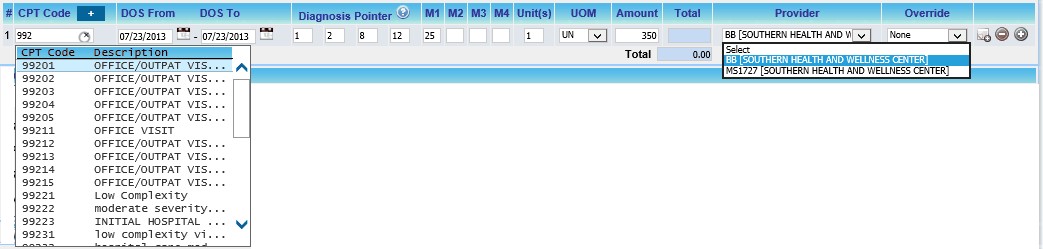
| • | Next to diagnosis pointer Boxes are the Modifier Boxes marked as M1, M2, M3 and M4. Enter the Modifiers if required in the Modifier Boxes. Enter the values of Units or Minutes in the Units Area & select appropriate values from the drop down under UOM field. The charge of that particular procedure code entered will automatically populate in the Amount Field. Select the provider from the provider drop down. If we need to Override the Default Line status of the Procedure code which may be “BILL TO PR”, “BILL TO PT” or any line status, it can be overridden by selecting the status from Override Drop down |
| • | For any reference if we need to enter any notes for that particular CPT entered, we can enter the Notes by clicking on the  |
Additional Information Area:
Superbill details are specified in this area & are classified under five different tabs, ‘Main’, ‘Condition’ , ‘Accident’, ‘Lab’ & ‘other’.
Main (F9):
Details of the Superbill like Place of Service, Service Location, Rendering Provider, and Referring Provider etc. is displayed here. In the Patient payment Field, The total account balance of the patient is also displayed.
We can post the on account payment directly from here without going to Payment entry screen by pressing the Post link (link to Add/Edit Payment Entry) marked in the Account Balance. The Copay and Deductible status are also set for this area. We can enter Copay & Deductible amount from this area by pressing the ‘![]() ’ (link to Copay – Deductible payment entry) button aligned against Copay & Deductible fields. Take the appropriate Status of both Copay & Deductible from the drop-down.
’ (link to Copay – Deductible payment entry) button aligned against Copay & Deductible fields. Take the appropriate Status of both Copay & Deductible from the drop-down.
If we check the Auto Post Box & a Copay payment entry is already created for that copay, then copay will automatically post while generating the charges.
If we need to enter the percentage of coinsurance, that can also be entered in the ‘Co-ins%’ field.
If an Authorization for a particular insurance is entered for that patient & the same insurance is in the case, then those Authorization numbers will populate automatically when we click on the authorization field. Even we can add a new Authorization by pressing the ‘![]() ’ (link to Authorization) button aligned next to Authorization Field. Clear Field Icon ‘
’ (link to Authorization) button aligned next to Authorization Field. Clear Field Icon ‘![]() ’ will clear the entry of authorization Field.
’ will clear the entry of authorization Field. 
Condition (F8):-
Under this tab detail of the condition of the patient like Date Patient Unable to work from, Onset of Current Illness, Date of Pregnancy, Last X-ray date etc if required can be entered. The initial treatment date gets defaulted in charge entry from the case screen. 
Accident (F6):
Accident related details can be entered in this section if required. When Auto Accident is selected "Yes" The Auto Accident State will get enabled. Claim # of the workers compensation claims can be entered into the Worker Comp. Claim # field. 
Lab (F6):
CLIA # & lab charges can be entered here if necessary.

Others (F5):
Details of Supervising Provider, Ordering Provider, PCP, Service Auth. Ex. Code etc can be entered under this tab if required. The Service Authorization Exception Code is required when Providers are required by law (e.g. New York State Medicaid) to obtain authorization for specific services, but for the reasons listed in REF02, performed the service without obtaining the authorization. Check with your State Medicaid to see if this applies to your state. 
Notes:
Click the Notes ![]() icon to add Provider Soap Notes, Diagnosis Notes or Procedure Notes
icon to add Provider Soap Notes, Diagnosis Notes or Procedure Notes
If we need to view or print a Superbill, HCFA / 1500 or CMS / 1500 forms, check the appropriate boxes and click on print.
After entering all the necessary information, pick the appropriate action from the drop down list (i.e.) NEW, BILL to PR, or HOLD and then click the Save button. 